
A leaky bathtub faucet is a common plumbing problem where water keeps dripping from the tap even when it is fully turned off. It usually happens because of worn-out washers, damaged seals, or loose parts inside the faucet. This small issue can waste a lot of water over time.
Many people ignore a dripping faucet, but it can increase your water bill and create constant noise in your bathroom. The good news is that you don’t always need a plumber to fix it. With a few basic tools and simple steps, you can solve this problem at home.
In this guide, you will learn how to fix a Leaky Bathtub Faucet: an easy step-by-step guide, simply and clearly. It will help you understand the main causes, the tools you need, and the correct method to stop the leak quickly.
Causes of a Leaky Faucet
A leaky faucet usually happens when some internal parts get old or damaged. The most common reason is a worn-out washer or O-ring inside the faucet. These small parts stop working properly after long use.
Another cause is mineral buildup from hard water. Over time, minerals collect inside the faucet and block smooth water flow. This can lead to dripping even when the faucet is turned off.
Loose or damaged parts can also cause leaks. If the faucet is not tight or some components are broken, water can slowly escape. These problems are simple but can waste a lot of water if not fixed early.
Tools You Need
To fix a leaky bathtub faucet, you will need a few basic tools. Most of them are common and easy to find at home. Having the right tools makes the job faster and easier.
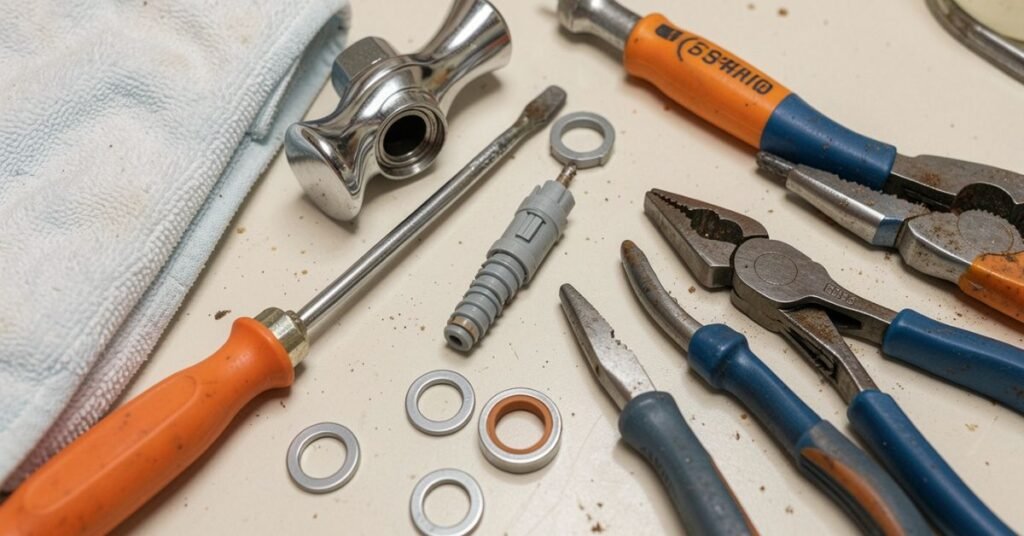
You may need a screwdriver, an adjustable wrench, and pliers. A flashlight can also help you see inside small or dark areas. In some cases, you might also need replacement washers or O-rings.
It is also good to keep a cloth or towel nearby. This helps clean water spills and keeps the area dry. With these simple tools, you can fix most faucet leaks without any problem.
Turn Off Water Supply
Before starting any repair, you must turn off the water supply. This is very important to avoid water spilling everywhere. It also keeps your bathroom clean and safe.
Look for the water shut-off valve near your bathtub or in the main water line. Turn the valve clockwise until it stops. This will stop the water flow completely.
After turning it off, open the faucet to check. Make sure no water is coming out. Once it is fully off, you can safely start the repair work.
Identify Faucet Type
Before fixing a leaky bathtub faucet, it is important to know what type of faucet you have. Different faucets have different parts and repair methods. Identifying the correct type helps you avoid mistakes during repair.
There are mainly three common types of bathtub faucets. These include compression faucets, cartridge faucets, and ceramic disk faucets. Each type works in a different way and needs a slightly different fixing approach.
| Faucet Type | How It Works | Common Issue Causing Leak |
| Compression Faucet | Uses a rubber washer to stop water | Worn-out washer |
| Cartridge Faucet | Uses a cartridge to control flow | Damaged cartridge |
| Ceramic Disk Faucet | Uses ceramic plates for sealing | Dirty or cracked disk |
Knowing your faucet type makes the repair process much easier and faster. It also helps you choose the right replacement parts and tools.
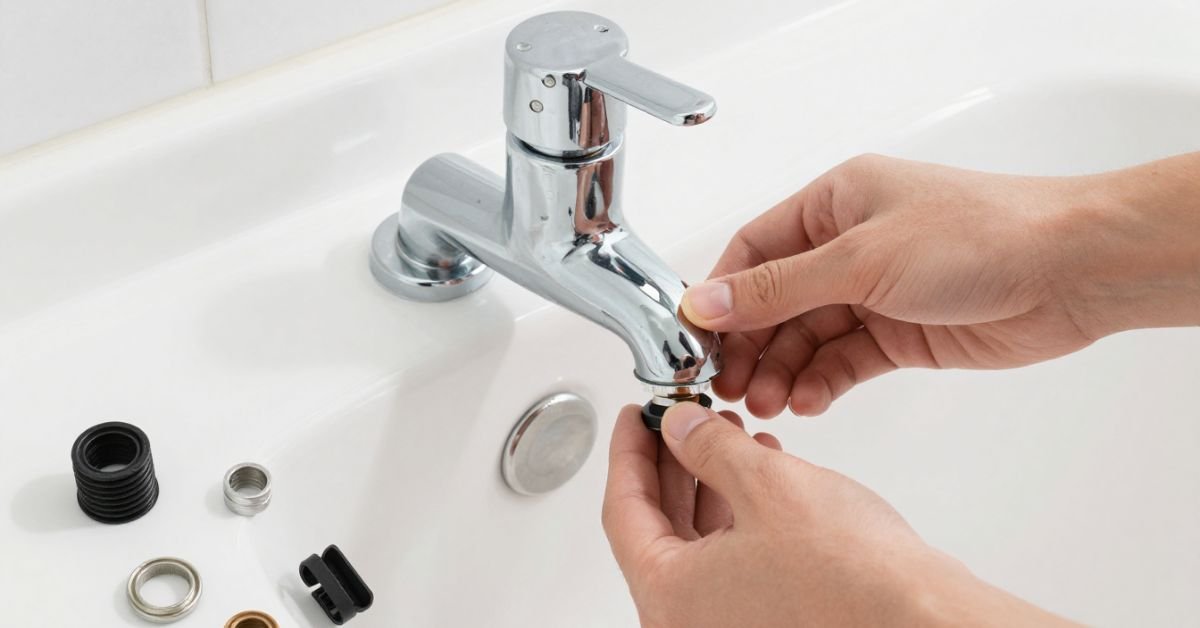
Remove Faucet Handle
Start by locating the screw that holds the faucet handle. It is usually hidden under a small cap. Gently remove the cap using a screwdriver or knife.
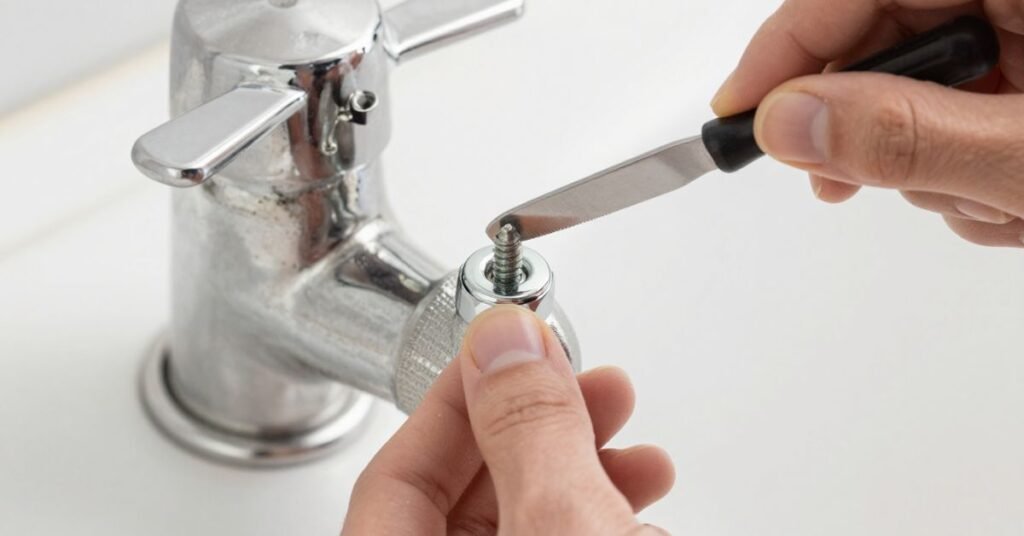
Next, use a screwdriver to loosen the screw. Turn it slowly to avoid damaging the handle. Once the screw is removed, keep it in a safe place.
Now pull the handle carefully. If it is tight, move it gently from side to side. Do not force it, as it may break the parts inside.
Inspect Internal Parts
After removing the handle, you can see the internal parts of the faucet. These parts control the water flow. Check them carefully to find any damage or wear.
Look at the washer, O-rings, and cartridge. These are the most common parts that cause leaks. If they look cracked, torn, or old, they may need replacement.
Also, check for dirt or rust inside the faucet body. Even a small buildup can affect how the faucet works. Clean the parts gently before moving to the next step.
Replace Washers and O-Rings
If the washer or O-rings are damaged, you should replace them. These small parts are often the main reason for a leaking faucet. New parts help stop the water leak properly.
First, remove the old washer or O-ring carefully. Take note of its size and shape. This will help you buy the correct replacement.
Now place the new washer or O-ring in the same position. Make sure it fits tightly and sits properly. A correct fit will help stop the leak completely.
Clean Mineral Buildup
Mineral buildup happens when hard water leaves deposits inside the faucet. These deposits can block water flow and cause leaks. It is important to clean them properly during repair.
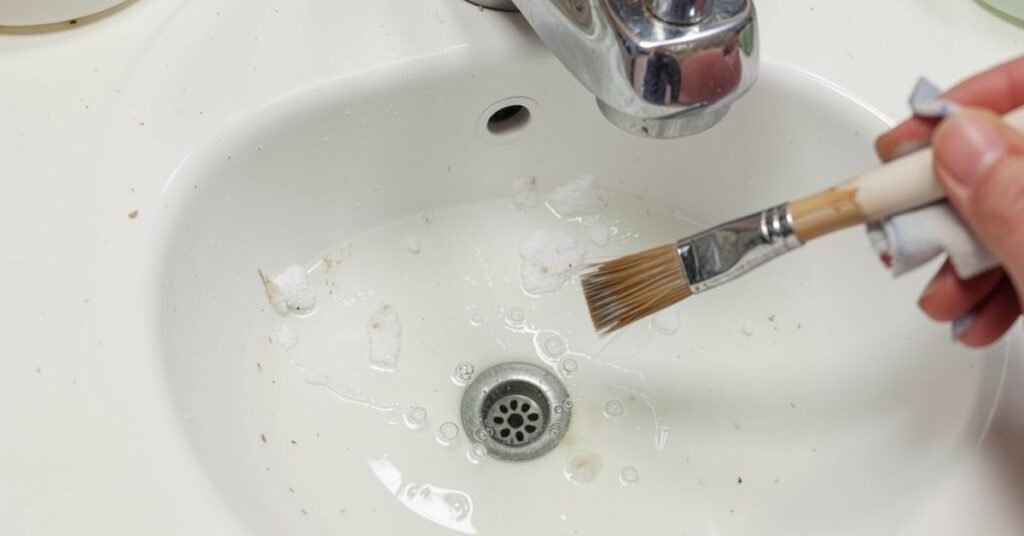
Use a small brush or cloth to remove visible dirt and white deposits. You can also use vinegar to soften hard mineral buildup. Let it sit for a few minutes before cleaning.
Make sure all parts are clean and smooth before reassembling. Even a small buildup can affect how the faucet works. A clean faucet helps improve water flow and stop future leaks.
Reassemble Faucet
After cleaning and replacing the damaged parts, it is time to put everything back together. Start by placing all internal parts in their correct position. Make sure nothing is missing.
Next, reattach the faucet handle carefully. Tighten the screw slowly using a screwdriver. Do not over-tighten it, as it can damage the handle.
Finally, check that all parts are fitted properly and securely. The faucet should feel firm and stable. A correct reassembly ensures smooth water flow without leaks.
Test for Leaks
After reassembling the faucet, turn the water supply back on. Do it slowly to avoid sudden pressure. Make sure the valve is fully open.
Now turn on the bathtub faucet and check the water flow. Look closely for any dripping or leaking. Check both the handle and the spout area.
If you see no leaks, the repair is successful. Let the water run for a few minutes to be sure. A proper test helps confirm everything is fixed correctly.
Conclusion
Fixing a leaky bathtub faucet is not as hard as it seems. With the right tools and simple steps, most people can do it at home. It mainly involves finding the problem and replacing small worn-out parts.
A quick repair can save water and reduce your water bill. It also stops annoying dripping sounds in your bathroom. Regular checks can help you avoid bigger plumbing problems in the future.
FAQs
1. Why is my bathtub faucet leaking?
It usually leaks due to worn washers, damaged O-rings, or mineral buildup inside the faucet.
2. Can I fix a leaky bathtub faucet myself?
Yes, most leaks can be fixed at home with basic tools and simple repair steps.
3. How much time does it take to fix a faucet leak?
It usually takes around 20 to 40 minutes, depending on the damage.
4. Do I need a plumber for a dripping faucet?
Not always. Small leaks can often be repaired without professional help.
5. What is the most common cause of faucet leaks?
The most common cause is a worn-out rubber washer inside the faucet.