
A garage door sensor is an important safety device. It helps prevent the garage door from closing when something is in the way. These sensors are usually placed near the bottom of the garage door tracks. When they work properly, they help keep people, pets, and vehicles safe.
Have you ever pressed the garage door button and noticed that the door would not close? This is a common problem for many homeowners. In many cases, the garage door sensor is the reason. The good news is that most sensor issues are simple to fix and do not require professional help.
Learning how to fix a garage door sensor can save you time and money. Common problems include dirty lenses, loose wires, or sensors that are out of alignment. In this guide, you will learn 10 simple steps to find the problem and get your garage door working properly again.
Understanding Garage Door Sensors
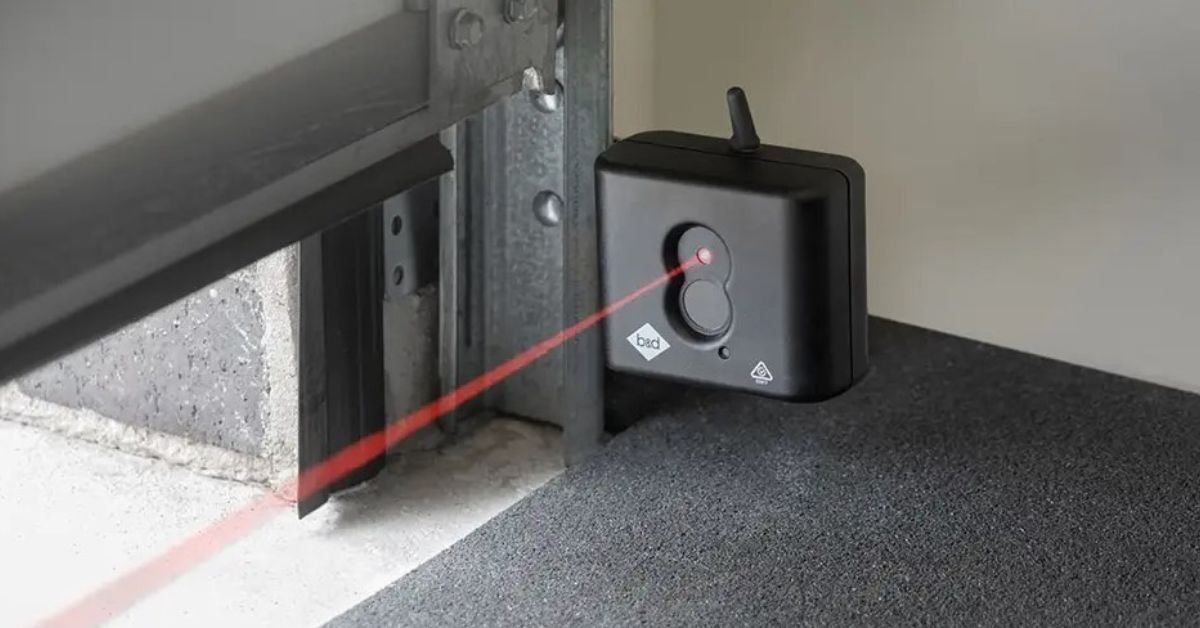
Garage door sensors are small safety devices placed near the bottom of the garage door tracks. They send an invisible beam from one sensor to the other. When the beam stays connected, the garage door can close normally. These sensors help prevent accidents and damage.
If an object, pet, or person blocks the beam, the sensors stop the door from closing. This safety feature protects everyone around the garage. Modern garage doors use sensors as an important part of their operation. Without working sensors, the door may not function properly.
Garage door sensors can develop problems over time. Dust, dirt, loose wires, or poor alignment can affect their performance. When this happens, the door may reverse, refuse to close, or show blinking sensor lights. Understanding how these sensors work makes it easier to find and fix common issues.
Common Signs of Sensor Problems
Garage door sensor problems often show clear warning signs. The most common issue is when the garage door starts to close and then suddenly reverses. In some cases, the door may not close at all. These signs usually mean the sensors are blocked, dirty, or out of alignment.
You may also notice blinking sensor lights or unusual door behavior. Paying attention to these symptoms can help you find the problem quickly. Some common signs include:
- The garage door will not close completely.
- The door reverses before touching the ground.
- Sensor indicator lights keep blinking.
- The garage door only closes when you hold the wall button.
- The door moves unevenly or stops unexpectedly.
Recognizing these signs early can prevent bigger problems. A quick inspection of the sensors can often reveal the cause and help restore normal operation.
Safety Steps Before You Begin
Before working on your garage door sensors, take a few safety precautions. Garage doors are heavy and can move unexpectedly. Make sure the door is fully closed before you start. This helps reduce the risk of injury while inspecting the sensors.
Disconnect the garage door opener from its power source if you plan to check wiring or electrical connections. This prevents accidental door movement during repairs. Keep children and pets away from the work area until the job is finished.
Wear safety gloves if you are handling wires or metal parts. Use a stable ladder if you need to reach higher areas around the garage door system. Taking a few minutes to follow these safety steps can make the repair process safer and easier.
Tools You May Need
Most garage door sensor repairs do not require special equipment. A few basic tools can help you inspect, clean, and adjust the sensors. Having these items ready before you start can save time and make the job easier.
Some useful tools and supplies include:
- Soft microfiber cloth
- Screwdriver set
- Measuring tape
- Small level tool
- Flashlight
- Safety gloves
- Step ladder
These tools can help you clean dirty sensor lenses, tighten loose parts, and check sensor alignment. In many cases, simple adjustments are all that is needed to get the garage door working properly again.
How to Fix Garage Door Sensor
Fixing a garage door sensor usually starts with a simple inspection. Check both sensors for dirt, dust, or any object blocking the beam. Clean the sensor lenses with a soft cloth and make sure nothing is placed in front of them. Many sensor problems can be solved with this quick step.
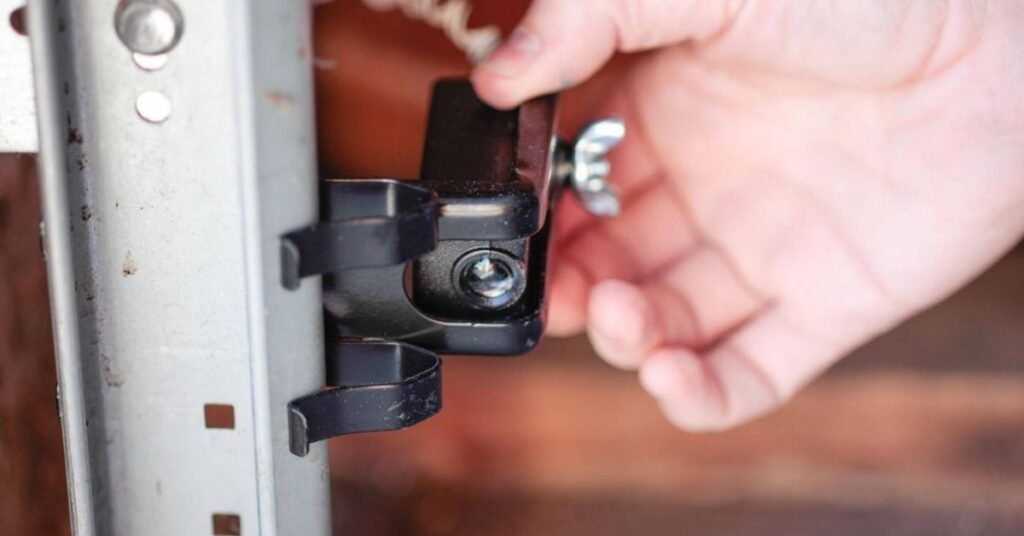
Next, check if the sensors are properly aligned and securely attached. Look for loose wires or damaged connections around the sensor brackets. Tighten any loose screws and adjust the sensors until they face each other directly. After making the adjustments, test the garage door to see if it opens and closes normally.
Cleaning the Sensor Lenses
Dirty sensor lenses are one of the most common causes of garage door sensor problems. Dust, cobwebs, and dirt can block the sensor beam. When this happens, the garage door may not close properly. A quick cleaning can often solve the issue.
Use a soft microfiber cloth to gently wipe both sensor lenses. Avoid using rough materials that could scratch the surface. If there is stubborn dirt, lightly dampen the cloth with water. Clean carefully and make sure the lenses are dry before testing the door.
After cleaning, check the sensor lights. Most sensors show a steady light when they are working correctly. If the lights stop blinking, the problem may be fixed. Test the garage door a few times to make sure it opens and closes without any issues.
Checking Sensor Alignment
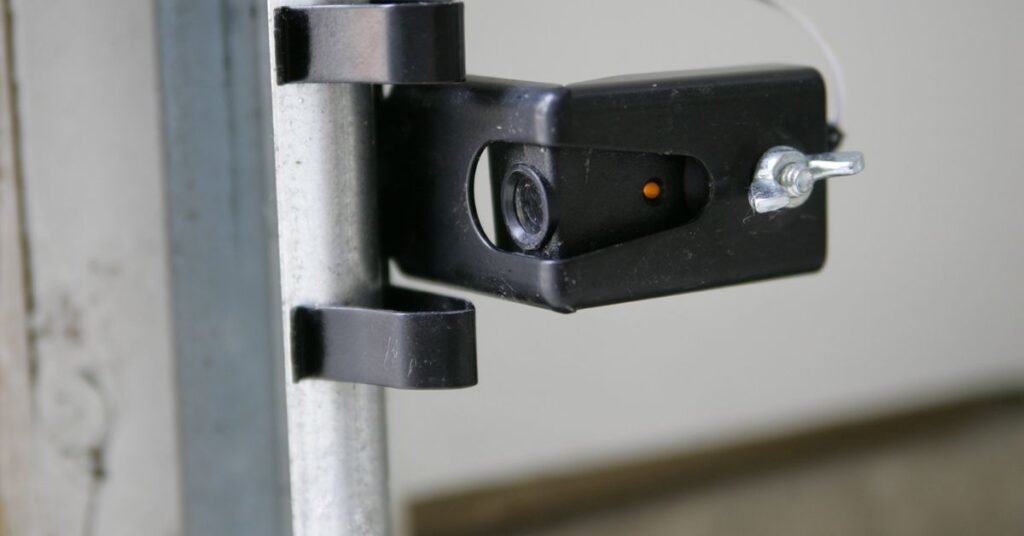
Garage door sensors must face each other correctly to work. If one sensor moves out of position, the invisible beam can break. This can stop the garage door from closing. Sensor alignment problems often happen due to vibrations, accidental bumps, or loose brackets.
Check both sensors and make sure they are pointing directly at each other. Most sensors have indicator lights that help show proper alignment. Look for these signs:
- Both sensors are at the same height.
- The indicator lights stay solid.
- The brackets are tight and secure.
- Nothing is blocking the sensor beam.
If needed, gently adjust the sensors until the lights become steady. Tighten any loose screws after making adjustments. Once the sensors are aligned, test the garage door to confirm that it is working correctly.
Inspecting Wires and Connections
Damaged or loose wires can prevent garage door sensors from working properly. Over time, wires may become worn, disconnected, or damaged by moisture and pests. A careful inspection can help you find these issues before they cause bigger problems.
Start by looking at the wires connected to both sensors. Check for cuts, cracks, or loose connections. Make sure the wires are firmly attached and not hanging freely. If you notice any damaged sections, they may need to be repaired or replaced.
Also inspect the wiring near the garage door opener unit. Sometimes a loose connection at the main unit can affect sensor performance. After checking and securing all connections, restore power and test the door. If the sensors work normally, the wiring may have been the source of the problem.
Garage Door Sensor Troubleshooting
Garage door sensor problems can have different causes. Some issues are easy to fix, while others require a closer inspection. The table below can help you identify common problems and find the right solution.
Use this troubleshooting guide when your garage door does not work as expected. Start with the simplest fixes first. In many cases, cleaning or adjusting the sensors can solve the problem quickly.
| Problem | Possible Cause | Solution |
| Garage door will not close | Sensor beam is blocked | Remove any object blocking the sensors |
| Sensor light is blinking | Sensors are misaligned | Adjust sensors until lights stay solid |
| Door closes and then reverses | Dirty sensor lenses | Clean both sensor lenses with a soft cloth |
| No sensor light | Power issue or loose wire | Check power supply and wire connections |
| One sensor light is off | Faulty sensor or damaged wire | Inspect wiring and replace damaged parts |
| Door only closes when holding wall button | Sensor malfunction | Clean, align, and test the sensors |
| Sensors work sometimes | Loose mounting brackets | Tighten all screws and brackets |
| Door stops halfway | Interrupted sensor beam | Remove obstructions and realign sensors |
| Sensors appear clean but do not work | Internal sensor failure | Consider replacing the faulty sensor |
| Garage door opener beeps | Sensor communication issue | Check wiring and alignment |
| Door closes unevenly | Sensor position is incorrect | Reposition sensors at the same height |
| Lights flicker on sensors | Loose electrical connection | Secure all wire connections |
| Sensors get dirty often | Dusty garage environment | Clean sensors regularly |
| Door does not respond after repairs | Opener needs resetting | Reset the garage door opener system |
| Problem continues after troubleshooting | Major hardware issue | Contact a professional technician |
Testing the System After Repairs
After completing the repairs, it is important to test the garage door system. Open and close the door several times using the remote or wall button. Watch the door carefully and make sure it moves smoothly without stopping or reversing unexpectedly.
Next, test the safety function of the sensors. Place a small object, such as a box, in the path of the sensor beam. Try to close the garage door. The door should stop and reverse when the beam is blocked. This confirms that the sensors are working correctly.
Also check the sensor indicator lights. They should remain steady and not blink during operation. Listen for any unusual sounds and make sure all parts are secure. If the door works properly during multiple tests, the repair was successful and the system is ready for regular use.
Wrap Up
Fixing a garage door sensor is often easier than many people think. Most problems are caused by dirt, poor alignment, or loose connections. With a few basic tools and simple checks, you can often restore normal operation without calling a technician. Regular maintenance can also help prevent future sensor issues.
By following these steps, you can keep your garage door working safely and smoothly. Always test the system after making repairs to ensure the sensors respond correctly. If the problem continues after troubleshooting, it may be time to seek professional help. A properly working sensor system helps protect your family, pets, and property every day.
FAQs
1. Why is my garage door sensor blinking?
A blinking sensor light usually means the sensors are misaligned or something is blocking the beam between them.
2. Can dirty sensors stop a garage door from closing?
Yes. Dust, dirt, and cobwebs on the sensor lenses can interrupt the beam and prevent the door from closing properly.
3. How do I know if my garage door sensors are aligned?
Most sensors have indicator lights. When the sensors are aligned correctly, the lights usually stay solid and do not blink.
4. Do I need a professional to fix garage door sensors?
Not always. Many sensor problems can be fixed by cleaning the lenses, adjusting alignment, or tightening loose connections.
5. How often should I check my garage door sensors?
It is a good idea to inspect and clean the sensors every few months to keep the garage door operating safely and efficiently.